Saturday, November 30, 2013

Minimal kick/push scooter stand/rack

4T - the scooter stand with a twist.

This is what the 4T scooter stand looks like.  It is made of only 4 tee PVC couplers.  So if you count, the material cost is slightly over $1.

The 1st principle of stands is that you have to make use of your own weight.  There is always a groove between the flat feet rest and the front wheel of every scooter.  This is where the scooter is slightly lifted off the ground by a horizontal bar.  Whether the front wheel is turned sideways does not matter.  It depends on what position of the scooter design feels more stable.

The stand is based on the 45 deg slope design common for bikes.

In the original design the two sides of the stand are parallel.  The handle rest on one of the side bars with a little bit off vertical.  It is still very stable.  The intention is to add some guides at the top end of the pipes to make the handle perfectly vertical with respect to the front-rear axis.  However, it was discovered that a little twist of the side bars will do just that.  And because the base is now wider, the stand is more stable.

You can make it prettier, stronger, but you can't beat using only 4 tee's.  So this is it.  Obviously when you are doing a rack you can modify it to be more space efficient.  But you can put the stands as is very closely side-by-side with the twisted legs crossing each other.

If you just lift the handle the stand goes with you.

Wednesday, November 27, 2013

Self-balancing bike stand / rack


I was moving the bikes from the garage to store outside with weather "proof" covers.  So the kids can take a ride whenever they like without having adults to bring the bikes out of storage.

I was trying to work out the physics but got stuck on some points.  So I built one base on other practical criteria but not on the absolute stability.  It is based on the common 45 deg inclied design.
Inclined bike rack
The stand for one bike, not the whole rack, is itself stable, rigid, do not waste space and do not waste PVC material.  The problem is that the stand is not making use of the weight of the bike itself.  It doesn't matter much for the whole rack but the inherent instability shows with only one "slice" of it.

I shortened the top rail so the wheel rest tightly on the 45 deg slope, shorter than the diameter of the wheel.  Like this, but the angle is 45 deg.
Wheel locked bike stand

In doing so the centre of the wheel is moved away and down from the rack.  But it turns out that the main instability comes from the centre of the wheel, trying to topple over to the sides.  I was doing the opposite that is desirable, that the centre of the wheel (probably top of the wheel too) should be restricted by the stand as much as possible.

I was worry wrongly about that the front wheel will turn itself horizontally and so the whole bike become unstable.  The front wheel does not have the tendency to turn, and friction make it difficult even if it wants to turn.
Vertical lock bike rack


The other is the vertical design that use the top rail and one of the bottom rail to lock the wheel so the weight of the bike is on top of the stand.  However, the vertical bar is too far from the centre and top of the wheel.  You can see there are "wings" on the side for balancing.

Horizontal support bike rack

There are horizontal designs that seem to use the weight of the bike.  And the centre of the wheel is close to the stand, but not the top of the wheel.  In any case it requires the kids to lift the wheel off the ground and onto the stand.  May be just a little bit of lifting but rolling over a pipe is much easier.
Self-balancing bike stand


My design turns out to be looking like a wheel clamp.  The wheel must be standing on two lower points of the stand (A and B), not touching or barely touching the ground.  Then a vertical bar raising up at an angle close to the centre and top of the wheel.

The stand, only about 5" wide (slightly wider than the length of two 3/4" tee couplings), is able to hold the bike vertical against strong wind without anything else.  So I gave up the idea of a rack, allowing the kids to park anywhere they want, even carrying the stand along with a bike ride.

Point C doesn't do anything, not touching the wheel.  It provide closure and support, otherwise the vertical bars on the two side of the wheel will be floating.

There is no need for exact dimensions, as long as the front wheel don't touch the ground.  You can make the length A-B short enough to make sure of that.  Short A-B doesn't lead to instability.  The bike is very stable in that direction.  You can also raise point B off the ground a bit to ensure that the wheel do not touch the ground.  Or use thicker pipes than 3/4".  You can also raise point A off the ground but the front wheel need to be lifted a bit to get into the stand, rather than roll over point A.

The gap between the bars is slightly thicker than the tires so the bike can get into and out of the stand freely.  As of now, because the spokes near the centre are thicker than the tires, this is where the stand holds the bike in position.  If that is not the case, the stand will hold the bike at the top of the wheel.

The perfect angle of the near vertical bars are just incidental.  You just need to make it close to the centre of the wheel and the top of the wheel.

8 tee's and short pipes may be about $2 total.

You can put the bike on a thin wall.

Wednesday, November 20, 2013

Validation of the Green Pee litter system for rabbits (and cats)

modified Breeze litter system
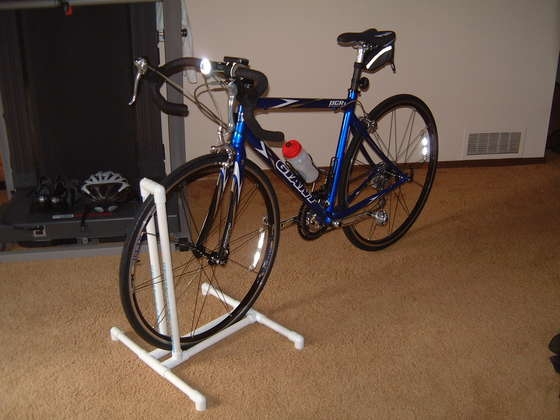
The modified Breeze litter system
The homemade Green Pee litter system is designed for cats, with ideas from the commercially available Breeze system.

The Breeze is one of those products that give away good, tested ideas when people can make it for next to nothing.  And if you promote it too much, it will affect the profitability of your other products.

First, the Green Pee is two stacked trays.  The top one has holes in it to drain liquid waste, and pea sized gravel for cats to cover their solid waste.  The bottom tray collects liquid waste and allow you to put in anything you fancy to deal with the odour and ultimate disposal.  You scoop away cats' solid waste on top, and sacrifice some gravel to go with it.  You have to maintain the level of gravel with new additions and the old ones are supposed to be rinsed and dried from time to time.

The Breeze that inspired Green Pea is the same thing.  The top tray has a plastic grid on most of the bottom for drainage.  The grid maintain the strength of a fairly large tray, some 20" by 12" (check spec).  The bottom tray is securely snapped onto the top, but has a drawer like tray in the middle that can be pulled out.  The tray just fit a custom sized pad with probably very absorbent gel.  The drawer is very shallow but will allow the gel in pad to expand a lot and hold a lot of liquid waste.  Instead of gravel, Breeze has it's own pellets that is perhaps made from soft rock with a waxy coating.

I got the Breeze just because I wanted to use disposable pellets that I liked - feline pine.  The slots will work better than drilling holes.  And that the feline pine's own double tray system, very similar to both, is only available online with expensive shipping.  The Green Pee is better, and cheaper.

The other reason I got the Breeze is because I was obsessed with adapting to rabbit use, getting rid of the pills / pellets / pebbles in a convenient way.  Unlike cat waste, the pills are the same diameter as typical pellets, so you can't scoop or filter them out to reuse the pellets.

It turns out that for rabbit use, the best adaption is nothing.  When you rinse the gravels, the pills will float while rocks sink.  You just pour away the pills and flush it, or pour the pills into a sieve / colander to get rid of the water, then dump the pills in trash.

Some people put a semi-rigid screen on top of the gravels to prevent the pills from mixing with the gravels.  You scoop away the pills from time to time.  That doesn't save much work because you need to wash the screen at least daily for the semi-solid waste.  And you need to wash the gravels anyway.

My particular problem is that the screen on top of gravels is too comfortable.  My rabbit occupied it as his bed and pee on his normal sleeping area.  Without the screen, he still likes to sleep on the gravels and pee on the corners of the tray.

I see no advantage of the Breeze pellets to gravels.  The regular cylindrical shape of the Breeze pellets may drain better, and the coating may reject water and therefore odour.  But I don't see any problem of using pure rock instead.  You can use finer gravels for you rabbit if you worry about their feet without pads.  There are very smooth and exotic aquarium gravels, but for a few dollars I get a huge bag from gardening store and filter out the larger than 1/4" stones with a discarded potting tray with a grid bottom.

As for what to put in the bottom tray, newspaper and baking soda is excellent I'm sure.  If you can get the huge baking soda box in the laundry department (non-food grade from the same manufacturer), it's much cheaper than from the baking department.

My problem is, I don't have any newspaper.  But even though the Breeze has a tiny tray, you can still put a lot of other stuff in it that will last you about a day or two.  If you only want to empty every week, you just need to put the Breeze on another tray and get rid of the drawer.  You can put crumbing cat litter and scoop away the crumbed solids.  But they are not that environmental friendly.  You can put anything absorbent down there and let nature equalize the liquid distribution.  You can put biodegradable gel for camping but that would be expansive.  I put in feline pine because I have some left.  There are similar much cheaper pellets but not in my town.  The pet store do have some pellets from recycled paper that are cheaper.  In general compacted pellets are more absorbent than other loose materials.

To convert a Breeze into a Green Pee, I put a screen on the grid, under gravels.  Some of the gravels are too fine and fall through the grid.  So far I keep the drawer system because it's a piece of cake to empty every day.  People use plastic canvas from sowing / craft stores for the screen that you can cut to size.  I use bug screens or those for windows and doors.  I use the thicker ones that seems to be weaved from nylon threads and coated with plastic.

The reason I gave up on pine pellets is that you have to keep paying for the consumable.  You can't separate the good pellets from the pills.  You need to keep adding fresh pellets so the degenerated dust will not stick to his feet and being carried around.  (This is minor.)  The Breeze drawer is too shallow for the pine pellets.  And you have to use a scoop to "encourage" the wet dust to go through the grid and down to the drawer.  The dust should fall through by itself but fresh pellets and wet dust can accumulate to a thick layer and it gets harder for the dust to fall through.  Feline Pine's own system may be better but I don't see how the problems are totally eliminated.

The only problem is drying the gravels.  You need two or three sets to rotate.  And you need a yard but can be done without one.  Pouring away the pills, soaking the gravels overnight will allow any dirt to rinse away the next day.  If you have space, spread the gravel into a single layer and sun dry.  If they are completely dry, you are not creating an environment to accumulate germs.  Germs cannot survive without water.  If you feel the need to disinfect anyway, household beach is effective when you soak the gravels.  But it is not environment friendly and can be harmful.  Germs that survive on animals adapt to neutral pH or 7.  You can kill germs with extreme acid or alkaline.  Vinegar can kill many germs.  If you buy citric acid crystals you can get more acidic solutions.  Washing soda should do too but vinegar is safe because you can eat it.  Baking soda is a weak alkaline so it cannot be effective.  You cannot mix acid and alkaline because you will neutralize them and become useless.  Alcohol and hydrogen peroxide are effective but because of the cost, they are only limited to small surface areas.  For Vinegar or Washing soda, you need to consider the concentration level.  If you can, check with cheap pH papers to get less than 4 or more than 9 for sufficient concentration.  But since washing soda is so cheap, I would think it is easy to be alkaline enough. 

Thursday, November 7, 2013

Total solution: Under sink pop-up ball rod too short


Firstly, the pop-up assembly can be beautiful if you use expensive copper pipes or aluminium tubes, and maybe spray paint it too.  I use left over pvc pipes so it cost nothing and earn from freed storage space.

The old short horizontal pop-up ball rod is still there.  I extend the length by putting a 1/2" cpvc tube on the outside of it.  For my case there is not enough space to put the cpvc tube without cutting it in two half first.  So I use a cpvc coupler to join it again after they are in position.  I have to do that because if I don't have access to the ball rod when I screw the ball in, I can't get the rod through the stopper hole.

To reduce play (side way movement) between the old ball rod and the cpvc tube, I put in between them a 5/8" tubing, the thicker version for fridge ice maker.  The OD, outer diameter of the rod is usually 1/4", same as majority of tubes for fridge ice maker.  The next size tubing has ID, internal diameter, of 1/4", with OD 5/8" (I think).  Therefore the thinner tubes can be inserted into the thicker ones.  The tubing also prevents the outer rod from sliding horizontally.  If you need to you can add glue to fix the outer cpvc tube.

The horizontal pop-up ball rod is connected to the vertical pull rod by a 3/4" pvc tee piece as shown.  That's the next size pipe that allows the horizontal rod (tube) to go through while allowing some play.

The tee piece is fixed to the vertical pull rod via a short vertical pvc pipe section.  The vertical pull rod is universally connected to a flat bar with holes in it.  A simple screw will fix the pvc pipe onto the bar securely.  First I drill through the pipe with a plastic bit.  I use a long precise dry wall screw to nail the pipe and bar together.  It's better to use nut and bolt.

For the horizontal rod you can also use 1/2" emt pipes for conduits.  It's cheaper and can be easily cut using the cheapest copper pipe cutters.  CPVC was phased out already.  I just had some in the garage. 

Friday, November 1, 2013

How to scare kids away screaming at Halloween and keep all the candies to yourself

I know I am unpopular  but I have to share this.  I have video to prove it.

My wife like to play trick and treat in the neighbourhood with the kids at Halloween, so to be fair she won't allow me to rest in peace, but have to hand out candies.  In the beginning I don't even dress up.  There is some sort of anti-climax when I opened the door and saw kids in fancy costumes.  But then I'm still popular as long as I have candy.

Once I had to take the kids to trick and treat.  It's good to wear costumes and mask so nobody knew who I was and nobody cared.  That suited my personality.  So I began the custom even when I am just handing out candy at my house.  I don't need to smile even if I want to eat the troublesome kids.  I don't need to praise kids for their fancy costume.  Then I discovered that even the cheapest scary mask will scare kids, in the right circumstances.

I always wanted to make some automatic candy dispenser so I don't even need to open the door.  But I know it have to be very tough because kids will try everything to get more out of it.  Then I thought of making them to put their hands inside the door to get candy.  Then I am the candy dispenser without them knowing.  Then I thought of a fake door.  With that you can do almost anything inside without opening the "door", and without revealing yourself.

I couldn't have done that in previous years.  This year it dawned on me that I can make a temporary door frame in no time, and it take a minute or two to put it up and put it down.  The proof of concept model takes a few minutes to make.  It worked but not the way I anticipated.  Then the whole frame is made, just cutting a few pipes.  Then it took a couple of hours to figure out how to cover the frame like a "door" so insects and the cold can't come in.  Now, the whole thing can be disassembled after test, and resembled in minutes at Halloween.  It's tough enough so kids cannot break their way in to the candy jar, and won't degenerate when they knock on the wrong place.

Once I made a hole in the fake door for the candy jar, everything came into place.  Instead of wearing scary costume and mask myself, I just pop up the mask suddenly through some secret opening in the door.  The surprise always work.  Some scream while running away.  Some beg me to show their friends who missed it.

Note to myself: it have to be in their face, or over their head, while they are not expecting, or while they are busy figuring out something out.

Then the candy jar is too easy.  I hinted that it's also a rat hole, snake den or spider home.  There's the danger that they will be hurt.  Also, the candy jar will be exposed only when they rang the bell, so I will be there to dispense the candy fairly.

Note to myself: an ordinary looking harmless fake door will add to the surprise element.  The security of the candy jar have to be increased.  If kids see something scary or heard about the house, they will not ring the door bell but to figure out how to get into the candy jar.

The results? My ear hurts because of the screaming!  Caught on cam too.  May be I should add some sound proof element at the fake door.  I had bigger girls running away screaming, but asking for reinforcement and came back.  When they gathered all their courage to put their hands into the candy jar (or rat hole), they threaten me not to scare them anymore or else ... It's really begging.  The threat seems to be that they will freak out.  I didn't prepare something scary inside the jar because I thought kids will laugh off my cheapo design.

As for the candy count, no matter how much I put in the jar, kids tend to spend  minimum time in it.  They are happy if they just grab one or two, just to show their friends that they pass the test.  Some kids ask their parents to grab some candy, who are not as greedy.  "Professional" bigger kids from other neighbourhoods tend to avoid my house.  They have news networks and don't want to waste time on some difficult house.  And kids came in big groups.  If the first few ran away screaming, my candies were safe until the next group.  Once you got the reputation, or people heard screams coming from the street, only the "brave" would come for the test - those who want to watch scary movies but scream all the time.

I may release some video clips.  I wasn't expecting it but this is the best Halloween I had.