My permeable pavement proved itself during the flood. In my concrete paved area, tubes are laid underground to prevent flooding. But drains can be blocked. My permeable paved area dries quickly when the rain stops.
The drying paving technique doesn't work, using lime and sand dry mixture to fill the gaps. They will never turn rock solid and starts to wear off slowly, better than soil though.
My next idea will be filling the gaps with pure wet lime first, and then sweep dry sand on top and squeeze into the gaps. Filling the gaps with wet lime is quick, because without sand in it the tool will not be blocked easily. Add dry sand on top is clean and easy. Hopefully it works.
Unfortunately, my lime bag got penetrated during the flood. They may or may not be working anymore.
Sunday, January 2, 2011

Super flush and sparkle a great success
The little hardware used almost immediately earn it's worth. The chlorine tablets for swimming pools are much cheaper, last for weeks each, and you can even find it in Albertsons's supermarkets. The pungent chlorine odour for the first flush in the morning is gone. The toilet bowl remains crystal clear. When it's not so clear you know it's time to add tablets.
The dual flush conversion doesn't work. Its because the toilet bowl (not the tank) do not fill up full every time. Using siphon to continuously fill the toilet bowl isn't practical. Too risky.
The dripper did get blocked after some weeks. But it's very cheap. Now I'm using those that can be opened up to unblock or to see what happened.
The dual flush conversion doesn't work. Its because the toilet bowl (not the tank) do not fill up full every time. Using siphon to continuously fill the toilet bowl isn't practical. Too risky.
The dripper did get blocked after some weeks. But it's very cheap. Now I'm using those that can be opened up to unblock or to see what happened.
Critter home a success
The modified critter home is a great success, passing the winter flood, storm and cold with flying colors.
The insulation is great. It's water proof. And even water leaked from the tiny cracks in the roof, they are still held in place by tapes even when wet. They don't get wet and still functions, and water didn't drip from the ceiling.
The flaps and magnetic closure were designed to keep warm from cold draft. It also prevents rain storms that went horizontal.
Well before the severe weather, we put the home on a pile of paving slaps to raise the height. We can use a big bucket under the litter opening to collect waste in one go. The horizontal rotating/sliding door works well for it's simplicity.
The raised acrylic platform inside the home is good. Dirt mostly fall down onto the floor level. The acrylic platform is kept clean by newspaper on top, fresh every day.
The gap below the platform and above the floor is filled with compacted plastic bags from the supermarkets. They are pretty warm.
Washing the home frequently is a bad idea. Too much work and it takes time to dry. Now the platform is mostly clean, if not you can pile more newspaper on top for a day or two. You can empty the dirt on the floor once a week. The wet litter has to be emptied through the hole daily or every other day if the weather is bad. Once a month or so I use the steam cleaner to clean the house thoroughly, without moving the whole thing.
The heater using broken soldering iron is good. It's simple mounting near the top so the critter cannot play with it. It's shielded with wood plates. Now that I don't wash and move around the house the mounting and wiring is simple. It will never overheat. It may be too mild but a warm wall instead of a freezing wall makes a lot of difference. You can always use a higher power soldering iron when not in use, taking the tip away.
Improvements: kids can do the upside down bottle, but will wet the place a bit. Keep the wet area away from the dry area so it will not make a wet mess. The gaps on the side of the platform could be sealed to control where the dirt collects.
The insulation is great. It's water proof. And even water leaked from the tiny cracks in the roof, they are still held in place by tapes even when wet. They don't get wet and still functions, and water didn't drip from the ceiling.
The flaps and magnetic closure were designed to keep warm from cold draft. It also prevents rain storms that went horizontal.
Well before the severe weather, we put the home on a pile of paving slaps to raise the height. We can use a big bucket under the litter opening to collect waste in one go. The horizontal rotating/sliding door works well for it's simplicity.
The raised acrylic platform inside the home is good. Dirt mostly fall down onto the floor level. The acrylic platform is kept clean by newspaper on top, fresh every day.
The gap below the platform and above the floor is filled with compacted plastic bags from the supermarkets. They are pretty warm.
Washing the home frequently is a bad idea. Too much work and it takes time to dry. Now the platform is mostly clean, if not you can pile more newspaper on top for a day or two. You can empty the dirt on the floor once a week. The wet litter has to be emptied through the hole daily or every other day if the weather is bad. Once a month or so I use the steam cleaner to clean the house thoroughly, without moving the whole thing.
The heater using broken soldering iron is good. It's simple mounting near the top so the critter cannot play with it. It's shielded with wood plates. Now that I don't wash and move around the house the mounting and wiring is simple. It will never overheat. It may be too mild but a warm wall instead of a freezing wall makes a lot of difference. You can always use a higher power soldering iron when not in use, taking the tip away.
Improvements: kids can do the upside down bottle, but will wet the place a bit. Keep the wet area away from the dry area so it will not make a wet mess. The gaps on the side of the platform could be sealed to control where the dirt collects.
Saturday, November 20, 2010
Self haircut with salon style and precision

Hair stylists do all the time is to hold your hair between the index and middle fingers, and then shorten the hair in a straight flat cut.
We can do that in a precise manner with a "clip" cut out from plastic gift boxes. The height of the clips determine the lengths of hair. Stand the a clip about vertically on your head. Put a thin strand of hair between the clips and pull straight. Hold the clip with thumb and middle fingers. Use your index finger as the location finder and try to cut it. Pull out your index finger at the last minute when you cut. It is easier not to look at the mirror when you cut.
The principle is, if you repeat cutting all over your head, no matter how the clips are oriented, all your hair will be of the same length, perfectly, more precise than in the salons. Actually you don't need to cut precisely. Hair are forgiving.
This is the same principle as the Flowbee and the Robocut. But you got it for free. Hand cut is a bit slower than machines but I do it in a warm bath. Make sure you have a filter to collect the hair. For any reason, if you do not finish in one bath, finish it another day.

You can just tape two plastic rulers together like using the clips above.
Moist cut, wet cut or dry cut does not make much difference. But wet hair tends to stay together so you won't miss a hair or two. Also scissors cut straight into wet hair with no slipping.
Dry cut is safer in the sense that what you see is what you get for newbies. You may also want the final final cut when dry, after washing your hair clean and dry completely.
Layers
I think multi-layers mean that you partition your hair into different groups, and cut each group with the same style and length.
The length of cut determines the hair length, as measured from the hairlines. Just as important, it determines the thickness or volume of hair.
Women are perfectly fine with a one-layer cut, with all hair the same length - 6", 1' or longer. In this case you split the front into the sides. The back will gradually be longer than the sides. There's the natural uneven look with a tapered end at the back.
Men are fine with a one-layer cut, 1" to 4", but the hairlines need to be trimmed, unless they want to look like girls.
If you need different layers, one method is to partition your hair carefully with clips. But the equal length cutting method do not require carefully partitioning. The different layers will blend into each other naturally.
Women
Bling at the front can use the same basic cut to get the natural look. To control the bling thickness, choose a length longer than the desired bling length. After the basic cut, trim back the bling to the desired level with a flat straight cut.
The sides may need to be shorter if you want to have very long hair at the back. You may want to cut the lower back hair shorter than the rest. And you may want to give the end of your hair a straight flat cut instead of a tapered look.
Men
The top of your head need to be longer, so the "swirl center" at top of your head can be covered. 2" to 3" will be typical. About the same length on top of your head to give some margin to play around with blow drying or other styling if desirable.
The front hairline needs to be about 1.5" or shorter if you want it to stay up sideways without falling down like blings.
Too short your hair will becomes spiky, dependent on hair type.
A good choice for the back of your head and the sides is 1". Short is easy to manage. But any shorter will be difficult using our primitive tool. And because of the tolerance of your cut, very short hair may start to look uneven.
Now the apparently difficult part - the neckline. Actually, even if you have absolutely straight hair, you can do a business clean cut all by yourself. Now after the basic cut, all your hair at the neck hairline will be about, say, 1" dangling down.

I picked this narrow head trimmer because it's cheap. Not really. You can trim off individual odd hair easily. If you make a mistake, it will be a minute mistake and nobody will notice.
You can use scissors and clippers. But for this trimmer you can touch your skin first, make sure the orientation is right and then move gradually to the cut point. Then move a few mm to cut the neighboring hair. In the mirror you always make mistakes unless you are experienced. One wrong scissor cut or clipper cut will ruin your hair style for weeks, until new hair grow back.
Now the most difficult part is apparently the ears. If you have curly hair you probably want to fully or partially cover your ears. If you have straight hair and want to cover your ears, you need to cut your hair with sufficient thickness on the sides.
Now if you want to show off your sexy ears, do a clean business cut, and you have absolutely straight hair, you have to read carefully. Not really.
You need help to hold down your ears so you can see where you are cutting in the mirror. A rubber band will do nicely.
Now comb your hair around your ears in all possible directions towards the ears, and trim off excess using the ear lines as a guide.
Then comb normally and trim the hair around the ears that is out of place. Since hair do not grow on the bones just around the ears, you can use that as a guide instead of the ear lines.
Finally, the hairline at the two sides near your ears need to be further trimmed. You trim it until it's neat and no odd hair stand out. This is the only places that you need to worry if the left and right are symmetrical. But seldom anyone look at you straight from the back within two feet.
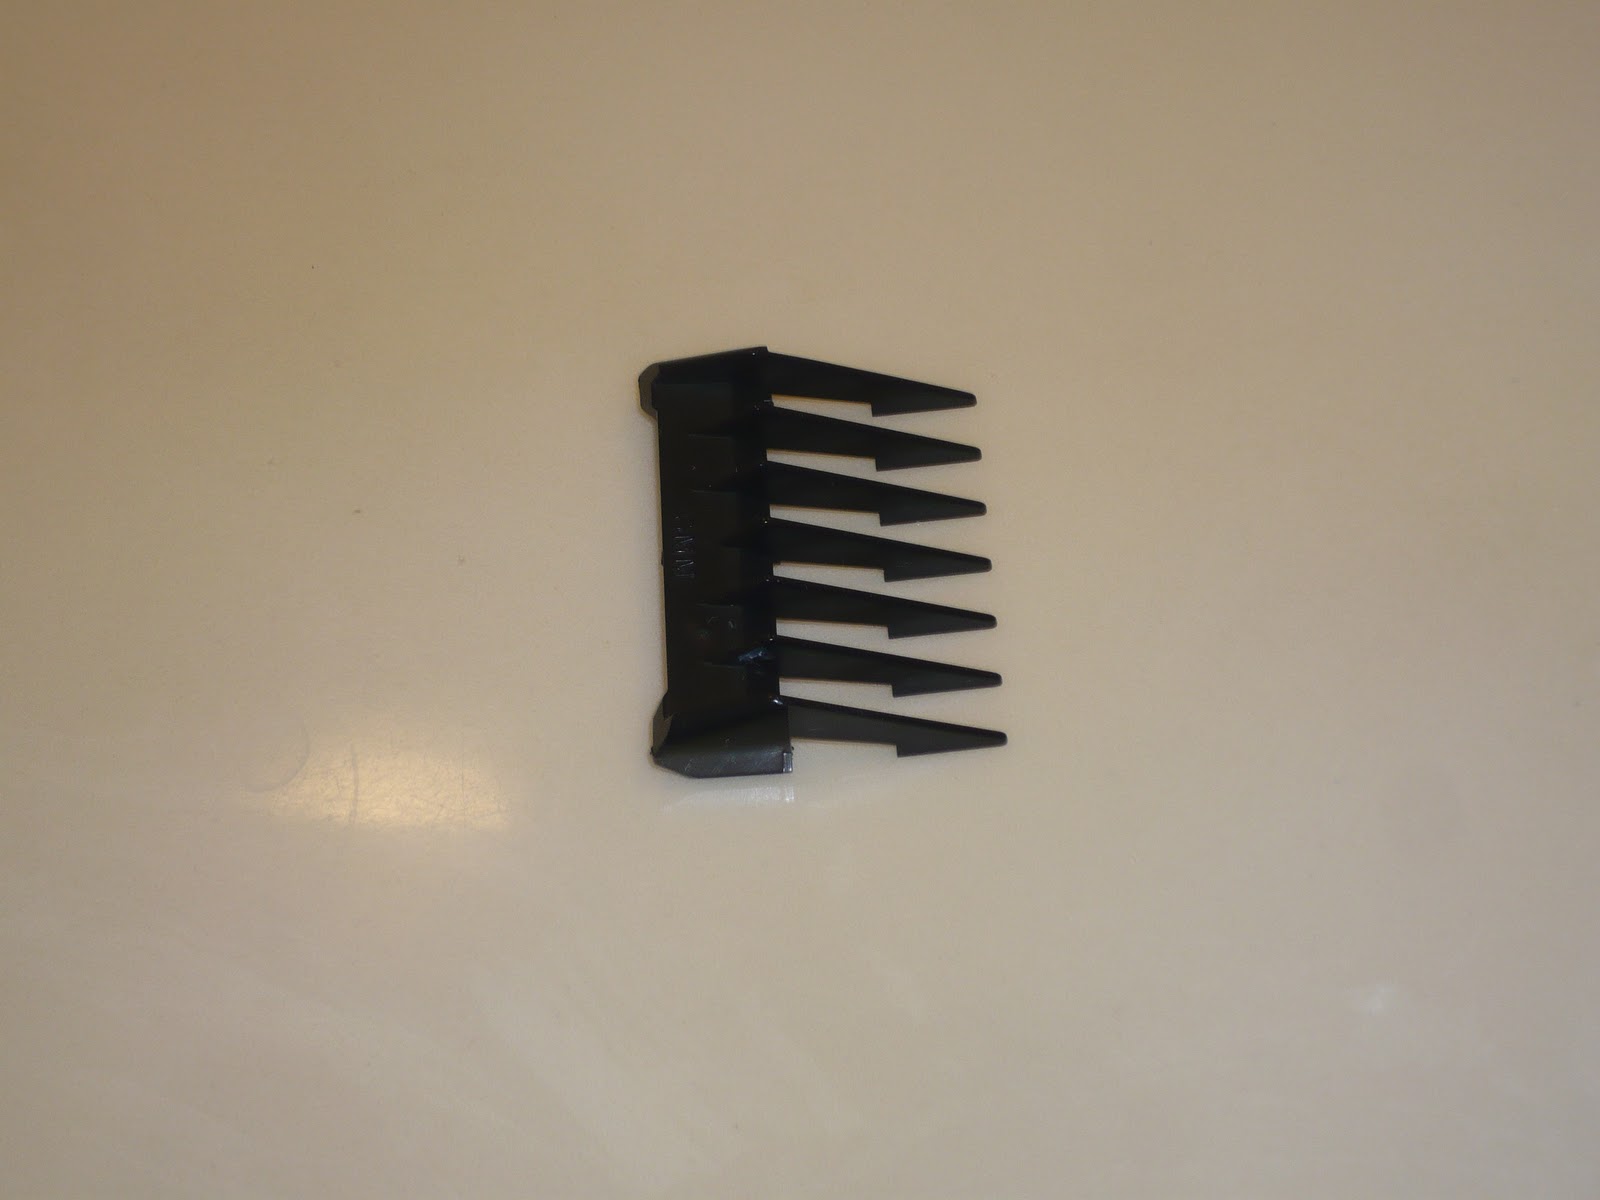
Clippers are supposed to give you fixed length hair, the same as the basic cut using clips. However, in the basic cut you pull you hair straight and therefore more precise. Clippers also cannot do long hairs such as 1".
That's all there is to it. Start long. If you don't like it you can try again tomorrow. If you cut too short you have to wait a few weeks.
Hair car for men and kids
In case you do not know, you always need conditioner. Two in one is not good, not good enough to detangle kid's hair. After shampoo and rinse, apply conditioner quickly like shampoo. You hair should be slippery all over. Then rinse thoroughly. It takes about an additional minute. But even the cheapest conditioner will make a lot of difference to your hair.
You may need some non-fragrant hair gel to style or to cover your mistakes. It can help your front hair to stay up and your spiky hair to stay down. It can add style to cover up that your hair is not that evenly cut.
Friday, October 8, 2010
Winterize your outdoor pet hourse
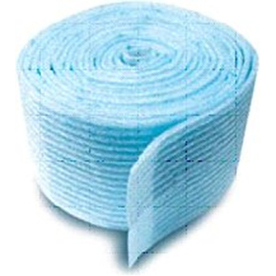
I found the perfect material for adding insulation to my outdoor pet house. Fiber glass is unsuitable because they are for filling cavity that you never touch or breath into. Rigid materials are difficult to cut to size, and do not fit my plastic house with odd corners and odd wall angles. Soft materials are too time consuming to fix onto my plastic walls.
This one looks like some packaging material like packing peanuts. It's like Styrofoam but semi rigid. It's like bubble wrap but it is very dense and the bubbles are not visible. It's cheaper than packaging material - 3.5" x 50' for less than $5.
It's not very thick so it's easy to go around non-flat places. After application it's not bulky so my pet house remains portable, and easy to dissemble for cleaning. It's light weight so I can stick it at the roof with tapes and not worrying something heavy falling down crushing my pet.
It goes very well with sticky tapes. I got clear packing tape 2" x 50m for less than $2. You can tape the insulation to plastic or to other pieces of insulation. Nothing absorb moisture so it will last a long time and the thermal property will not degrade. You can even use it to rain proof something.
The insulation will withstand water and likely steam. The tape may withstand water spraying on it but I'm not sure about soaking and steaming. Washing a big pet house is too much of a hassle. I'll scoop away the dirt and wipe wet spots with newspaper. Occasionally I steam clean the really part. So I don't worry about washing and steaming very much.
The insulation is very difficult to break by pulling, but can be easily cut with a scissor. You can also easily pierce holes in it. I don't feel that big and small pets will want to mess with it. Or, you can always use it only on the roof and on the outside.
The insulation will take adhesive well, such as the caulk adhesive that I use. But I want to rip off some of the insulation in summer, and reuse it the next winter. So I used adhesive tape. If I have a wooden house, I will use staple guns or thumb nails. If you take out the staples carefully, I guess the tiny holes will seal itself.
Because of it's semi rigid property, I can use it for sealing the metal grid door. Leave some extra insulation and it will cover the gaps when the door closes.
For the heater, there's simpler things than my broken low power solder iron. 10W is about right for a small heater. For 110V supply, you need 1.1K ohm resister with > 10W rating. The resister is pretty cheap and so is the electricity consumption.
If you have some cavity to fill, the best and free is supermarket plastic bags compacted. They trap air and do not absorb moisture. I have a two inch high void between the platform and the floor. The bags will get dirty given time. I can just wash them and dry them in the sun. Then use them again or recycle.
Sunday, October 3, 2010
Multi-flush toilet problems
Previously I discovered that my old 13G toilet can use as little water as new dual flush toilets, and maybe even less, because I have 2nd chances.
The adjustable flappers can reduce the water usage but maintain powerful flush. The problem is the refilling of the toilet bowl. Because less water is used, the tank refills faster, but the toilet bowl do not have enough time to refill, about an inch or less water level. This lead to very poor flush. Because of the poor flush, the toilet bowl will still be full after flush. So the next flush will be perfect. I call this odd-even flush phenomena.
You still save water if you need to flush twice for the even flush. Sadly no conventional valve can be adjusted to refill faster.
My experiment is to siphon water from the tank down the toilet bowl continuously with a driper. My estimate is that about 10 liter of water is wasted per day this way. So it is equivalent to a few flushes. So if the toilet is used a few times a day it will break even. The problem is having enough time in between flushes for the bowl to refill.
The adjustable flappers can reduce the water usage but maintain powerful flush. The problem is the refilling of the toilet bowl. Because less water is used, the tank refills faster, but the toilet bowl do not have enough time to refill, about an inch or less water level. This lead to very poor flush. Because of the poor flush, the toilet bowl will still be full after flush. So the next flush will be perfect. I call this odd-even flush phenomena.
You still save water if you need to flush twice for the even flush. Sadly no conventional valve can be adjusted to refill faster.
My experiment is to siphon water from the tank down the toilet bowl continuously with a driper. My estimate is that about 10 liter of water is wasted per day this way. So it is equivalent to a few flushes. So if the toilet is used a few times a day it will break even. The problem is having enough time in between flushes for the bowl to refill.
Ant blocking materials for house repair
Surprisingly, I have been battling ants most of summer, everyday. It wasn't that bad at all. In the past, I filled a few big holes so the ants cannot come in the house. Now since I have the ammunition, I can't tolerate ants crawling into the space between the house and me, even though they may not bother me at all.
Mostly I use my lime sand mix for filling big holes and for the underside of things, typically around the damp proof course. Lime shrinks a lot so sometimes one application will still leave holes when dry. Also there may be tiny holes and spaces in between applications.
The other main thing is wood stabilizing glue, because it is cheap. Typically around gaps on vertical wood frames and fences, and any holes on the ground. It is quick and easy, but cannot apply on the underside of things and don't stay long that way. So when all the masonry holes are filled, the ants start to come at the door frames and wooden fences. They don't walk into the doors though. They may not last long and they attract dirt, but they can be painted on or removed. It doesn't matter if I can't see the spots.
The other thing I use is clear caulk adhesive. It's just as easy and a little more expensive. It's for the places that I don't want it to look bad. It last but easily removed.
Mostly I use my lime sand mix for filling big holes and for the underside of things, typically around the damp proof course. Lime shrinks a lot so sometimes one application will still leave holes when dry. Also there may be tiny holes and spaces in between applications.
The other main thing is wood stabilizing glue, because it is cheap. Typically around gaps on vertical wood frames and fences, and any holes on the ground. It is quick and easy, but cannot apply on the underside of things and don't stay long that way. So when all the masonry holes are filled, the ants start to come at the door frames and wooden fences. They don't walk into the doors though. They may not last long and they attract dirt, but they can be painted on or removed. It doesn't matter if I can't see the spots.
The other thing I use is clear caulk adhesive. It's just as easy and a little more expensive. It's for the places that I don't want it to look bad. It last but easily removed.
Subscribe to:
Posts (Atom)